Introduction
- This series guides you on writing a simple spring boot unit test from scratch.
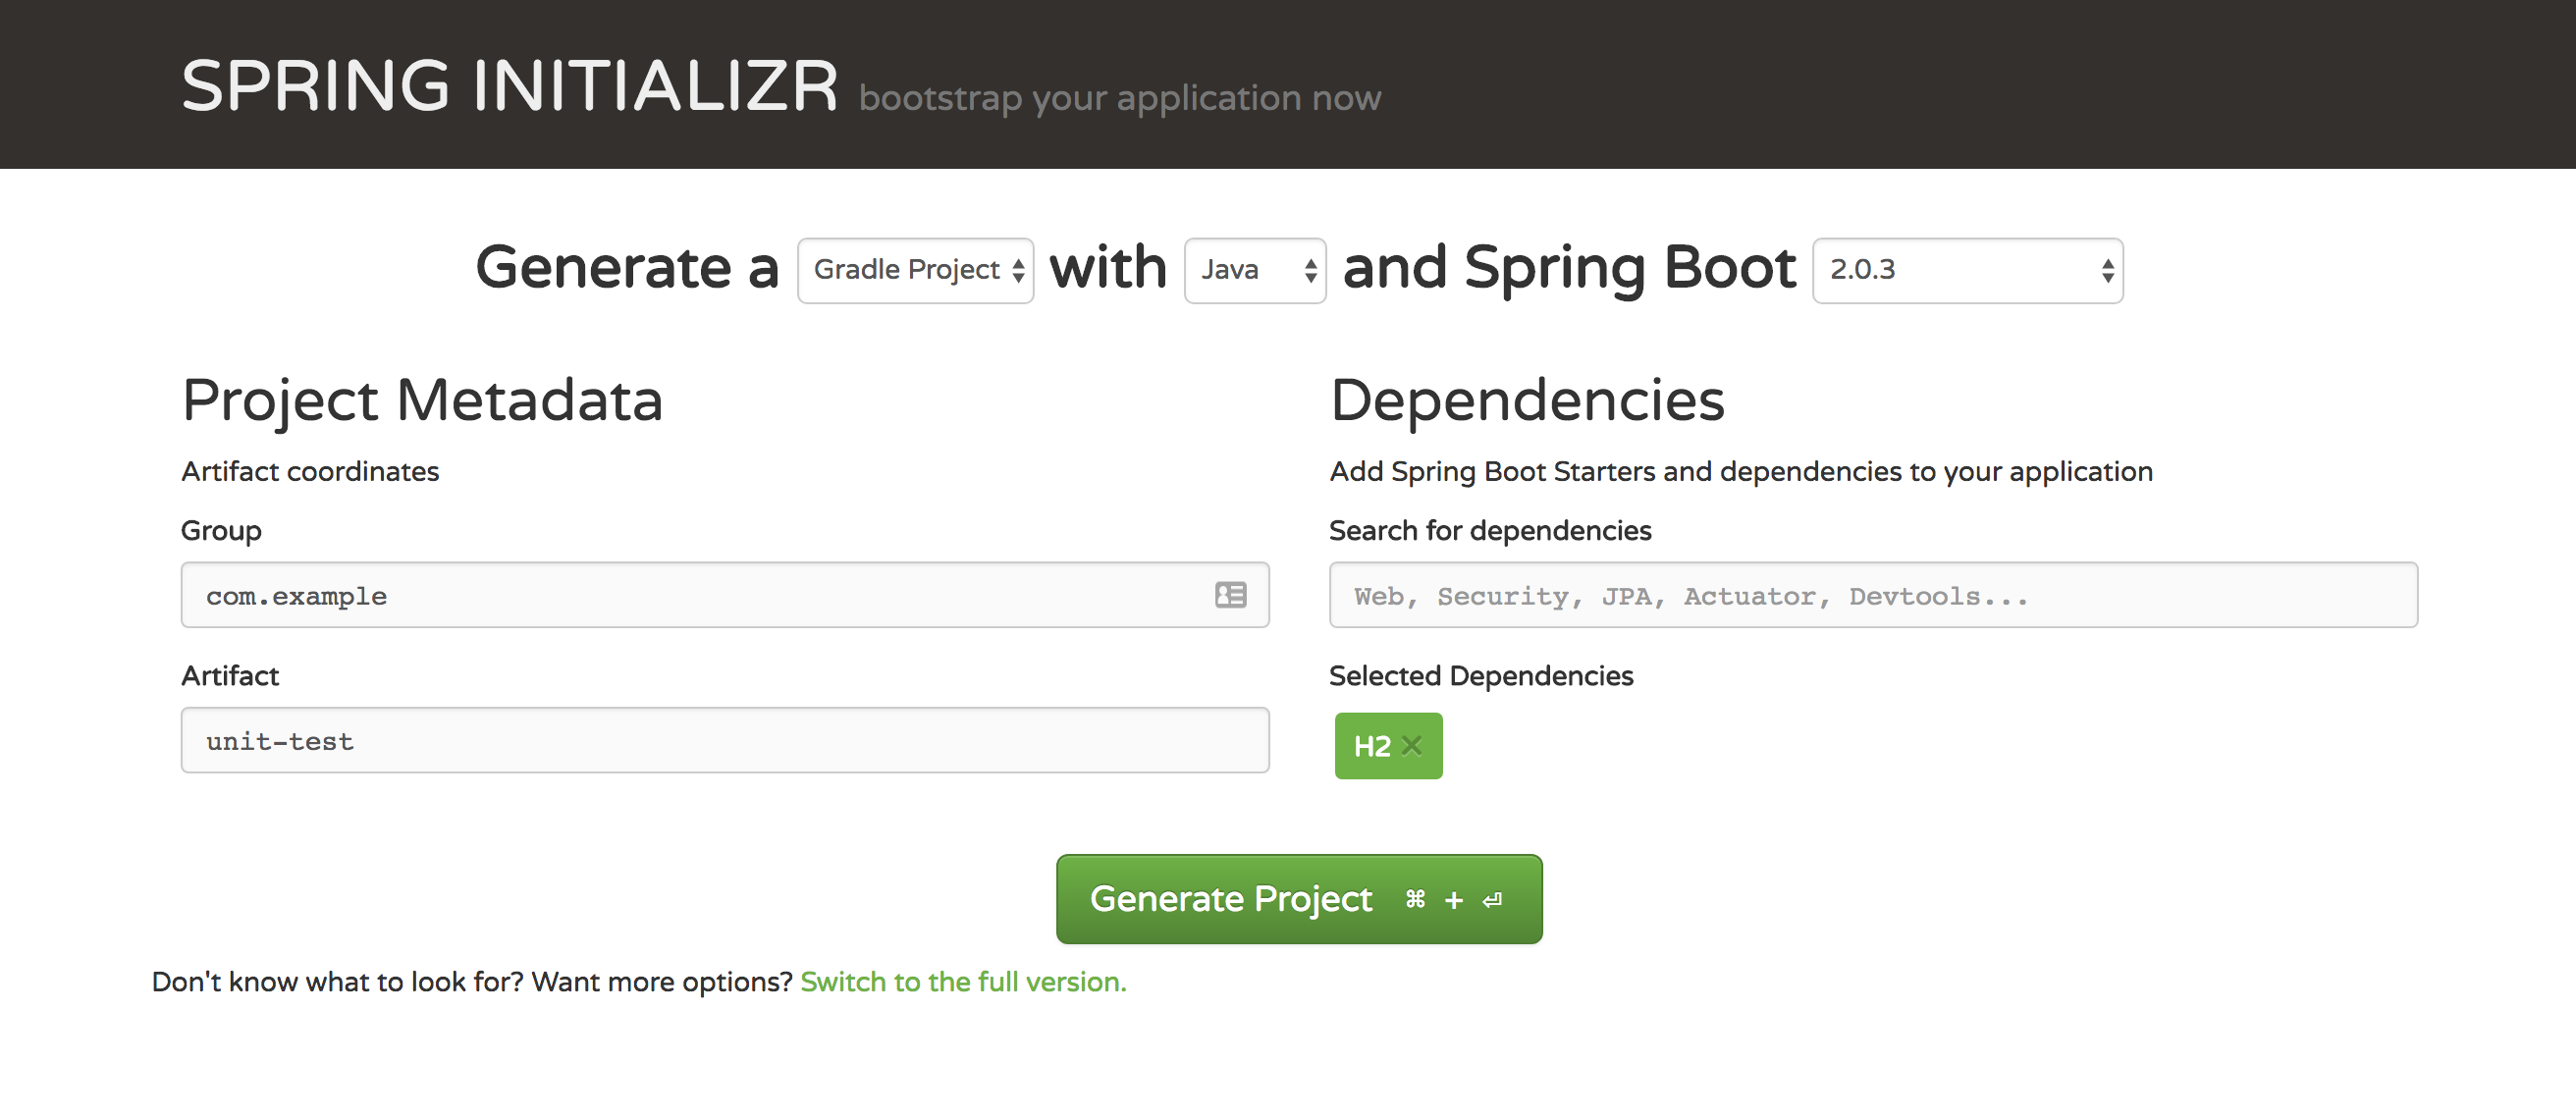
Let's generate a SpringBoot Application by using Spring Initialzr built by the lovely people at Pivotal!
The only dependencies we will need is an in-memory database H2 for now. Being an in-memory database, this means that everytime the application is restarted, all previous transactions/records will be flushed. This makes it great for caching purposes, just like Redis.
Below is an example of how Spring Initialzr looks like:

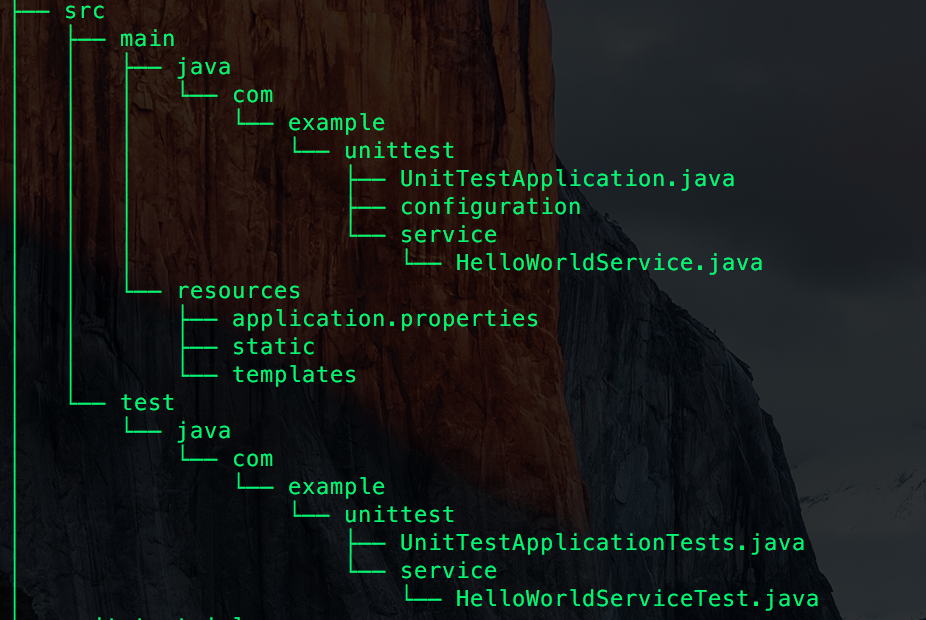
Let IntelliJ/Eclipse auto-import the necessary dependencies, gradle wrapper, etc. As a reference, our current directory structure will be something as of the following:

Notice that we have both a main and a test directory, indicating that our business logic lives in the main directory and all of our integration/unit tests lives in the test directory.
Looking at the main application, UnitTestApplication in this case, notice that we have @SpringBootApplication annotated. This is important, as our test is entirely dependent on it. Whenever we fire up a unit test, it will try to look for a Spring Context (registered beans) configuration, and all beans registered in their respective configurations are registered through this annotation.
Now, let's create a package named service and within that package, we will create a service class named HelloWorldService. Now, let's add a method to this service class:
@Service
public class HelloWorldService {

    public HelloWorldService() {}

    public String sayHello() {
        return "Hello World";
    }
}
Very simple, all this service does is say Hello World!
Within our test directory, we do the same by creating a new package named service, but now, we create a test service class named HelloWorldTest. It is important that both the main and test shares the same folder structure, because as our code scales and complexity grows, we will begin to have many different configurations, services and the structure of folders will determine where the test looks for these configurations!!!
So, let's create our test class:
@RunWith(SpringRunner.class)
public class HelloWorldServiceTest {

    private HelloWorldService helloWorldService;

    @Before
    public void before() {
        this.helloWorldService = new HelloWorldService();
    }

    @Test
    public void testSayHelloWorld() {
        Assertions.assertThat(helloWorldService.sayHello()).isEqualToIgnoringCase("hello world");
    }
In this class, we annotated it with @RunWith(SpringRunner.class), The @RunWith is specific to JUnit and it tells Spring which strategy to use to fire up Spring Context, in this case, SpringRunner.class.
If you have seen a SpringBoot test, you might say that wheres is the @SpringBootTest annotation? Remember carefully! We are doing a unit test here, so there is no need to fire the entire Spring Context up. As a reference, the @SpringBootTest tells the test to load the entire Spring Context (beans) everytime this test is fired.
The reason we do not need this is because all we are testing is whether HelloWorldService.sayHello() will return "Hello World. We do need require other configuration dependencies in cases like unit tests.
The @Before annotation, specific to JUnit tells the test that before testing a method, run this configuration. In our case, we are instantiating our service class giving it a new reference.
Then, the @Test annotation is the method that we are actually testing. We used the assertJ library and expect that the return method of helloWorldService.sayHello() should return the correct response.
Voila! We just completed a simple unit test in SpringBoot. There is a lot to understand since everything is hidden behind these annotations but this is precisely why it makes Spring Boot so powerful and easy to get started with what you need.
This is my first post, and I hope my explanations have helped as I am only about a year into learning SpringBoot.
I will be continuously posting my frustrations and solutions I've found as well as how I came to these solutions.